The 'found' curtains I used for the front of the van have been changed. I had four large terracotta-coloured curtains and realised that if I used two of those for the front, I could cut the other two into smaller sections for other windows.
The cardboard panels in the back windows have been falling out recently - the cardboard has soaked up some moisture from somewhere and lost some of it's rigidity, so I decided that it was time for a change.
I now have hand-sewn curtains at the back windows. To attach them I used net curtain wire which I have screwed to the inside of the doors - this meant actually drilling into my van, which was something I wasn't keen on initially, but after the first couple of holes I didn't think much about it.
Mrs suggested using another wire at the bottom of each window to stop the curtain flapping and this works perfectly (please excuse the dirty back windows, Tyrion is overdue a wash).
The success of these curtains made me want to try more, so I replaced the black curtain along the offside of the van. I used another net curtain wire, again screwed to the metal of the van, and ran it above both the windows on that side. As the bed presses up to this side of the van there is no need for a lower wire, which is good because it would block access through the sliding door on that side when in 'car mode'.
This left one single red shiny window infill. I thought about replacing this with a curtain but quickly realised that this was right over the worktop where the gas cooker would sit. I don't think having a fabric curtain that close to a gas burner would be a good idea, so I removed the infill, placed the fabric between it and the window then pushed the infill back in place. A quick trim with scissors left my GMB logo still visible on the inside, but the outside now showing black fabric.
So I have terracotta fabric front and back and black fabric down both sides. A very productive day's work.
Showing posts with label red. Show all posts
Wednesday, 29 April 2015
More Curtains
Labels:
bed,
berlingo,
camper,
conversion,
cover,
gas stove,
home made curtains,
kangoo,
laptop,
micro-van,
motorhome,
my,
partner,
red,
self build,
strange campers,
Toggle clips,
van,
window blinds,
worktop
Monday, 27 April 2015
Table Still Stable
It's been a hectic time recently but I still found time to clip my worktop in place and drive around for a while to see if it stayed where it should.
I am happy to report that it did.
Feel free to ignore the cardboard boxes ready for a run to the recycling centre.
I am happy to report that it did.
Feel free to ignore the cardboard boxes ready for a run to the recycling centre.
Thursday, 23 April 2015
Stable Table
My multi-purpose worktop has been very successful so far, but the issue I had with it was movement while driving. It was held in by a bungie cord which stopped the top part from moving but the bottom kept sliding out.
The easy answer would have been to attach it to the inside of the van with brackets, but it has to be removable so this wouldn't work for me. Instead I have used toggle clips (I didn't know they were called that until I found them in B and Q and read the name on the packaging). I have riveted an angled piece of tin to the interior trim in the back and riveted the hook to this tin. The toggle clip itself is simply screwed to the bottom of the unit. To prevent the toggle clip popping open while driving I have popped a split pin in the holes.
This sounds fairly simple but I had to cut holes in the trim using my dremel then cut and shape the tin, drill and rivet the hook and then put it all in the van so I could accurately mark the holes for the toggle clip screws. It was time consuming and for someone as inexperienced with tool work as I am, a bit of a challenge, but I finished it and it works.
Once again the craftsmanship is well below the standard anyone would expect from a tradesman, but as DIY done just for me, it's a pleasing thing to look at and it does what I need it to do.
The easy answer would have been to attach it to the inside of the van with brackets, but it has to be removable so this wouldn't work for me. Instead I have used toggle clips (I didn't know they were called that until I found them in B and Q and read the name on the packaging). I have riveted an angled piece of tin to the interior trim in the back and riveted the hook to this tin. The toggle clip itself is simply screwed to the bottom of the unit. To prevent the toggle clip popping open while driving I have popped a split pin in the holes.
This sounds fairly simple but I had to cut holes in the trim using my dremel then cut and shape the tin, drill and rivet the hook and then put it all in the van so I could accurately mark the holes for the toggle clip screws. It was time consuming and for someone as inexperienced with tool work as I am, a bit of a challenge, but I finished it and it works.
Once again the craftsmanship is well below the standard anyone would expect from a tradesman, but as DIY done just for me, it's a pleasing thing to look at and it does what I need it to do.
New Curtains
On moving into the new place I investigated the loft and found that it is going to be perfect to set up my keyboard and guitars and maybe even do some more recording. None of that is relevant to this blog, but the curtains that were left behind by the previous occupants certainly are.
I found several pairs of very large curtains - more than six foot square. Two pairs are a terracotta colour with some sort of arty writing on them. The other pair (perhaps two pairs, I can't remember without climbing back up the loft ladder) are dark brown, almost black.
I had a few metres of shock cord in the van (the stretchy stuff bungies are made from) which I had bought with something else in mind, but I found that this was the perfect solution to 'hang' these curtains. The cord runs from the hooks in the roof each side, just above the sliding doors, around the front of the cabin and hooks onto the sun visors. Once the idea had occurred to me it was a simple case of knotting a loop in each end and hooking it on. There was some playing to get the length and tension right, but that was the hardest part.
The pictures below show the original black curtain solution compared with the new brown curtains.
The black curtain ran across the van behind the front seats. This meant that when lying in the bed my feet pushed against the curtains. The new curtains run around the front of the cabin, meaning there is a lot more space in the curtained-off area. Their size means there is no issue with gaps and they are thick enough to block out a lot of light.
I am very happy with this new curtain solution and hope to make something similar happen in the back of the van, which is currently blacked out with window-shaped infills, one of which keeps falling off and is currently held on with sellotape.
I found several pairs of very large curtains - more than six foot square. Two pairs are a terracotta colour with some sort of arty writing on them. The other pair (perhaps two pairs, I can't remember without climbing back up the loft ladder) are dark brown, almost black.
I had a few metres of shock cord in the van (the stretchy stuff bungies are made from) which I had bought with something else in mind, but I found that this was the perfect solution to 'hang' these curtains. The cord runs from the hooks in the roof each side, just above the sliding doors, around the front of the cabin and hooks onto the sun visors. Once the idea had occurred to me it was a simple case of knotting a loop in each end and hooking it on. There was some playing to get the length and tension right, but that was the hardest part.
The pictures below show the original black curtain solution compared with the new brown curtains.
The black curtain ran across the van behind the front seats. This meant that when lying in the bed my feet pushed against the curtains. The new curtains run around the front of the cabin, meaning there is a lot more space in the curtained-off area. Their size means there is no issue with gaps and they are thick enough to block out a lot of light.
I am very happy with this new curtain solution and hope to make something similar happen in the back of the van, which is currently blacked out with window-shaped infills, one of which keeps falling off and is currently held on with sellotape.
Labels:
bed,
berlingo,
camper,
conversion,
cover,
home made curtains,
kangoo,
laptop,
micro-van,
motorhome,
my,
partner,
red,
self build,
strange campers,
van,
window blinds
Speedway Event
I have this evening booked a pitch at Pentney Park for Monday 8th June when I will be travelling 140 miles to watch the second round of the Speedway World Cup. This will be an exciting event for me for two reasons.
Taking Tyrion out for a real expedition is something I have been looking forward to for some time. I plan to pop out for a night or two locally between now and then (although there are only 43 days to go) but this will be his first proper planned expedition.
Secondly the arena where the event is taking place is one where I used to go every week to watch the home team, the Kings Lynn Stars. It will be a trip down memory lane just being there again and I plan to stand between bends one and two, just as I did every week twenty six years ago.
As well as revisiting the arena, I will be watching some of the great names in speedway - the same people I have been watching on television and YouTube, in their team events, best pairs matches and grand prix. It promises to be an extremely exciting evening.
Taking Tyrion out for a real expedition is something I have been looking forward to for some time. I plan to pop out for a night or two locally between now and then (although there are only 43 days to go) but this will be his first proper planned expedition.
Secondly the arena where the event is taking place is one where I used to go every week to watch the home team, the Kings Lynn Stars. It will be a trip down memory lane just being there again and I plan to stand between bends one and two, just as I did every week twenty six years ago.
As well as revisiting the arena, I will be watching some of the great names in speedway - the same people I have been watching on television and YouTube, in their team events, best pairs matches and grand prix. It promises to be an extremely exciting evening.
Labels:
berlingo,
camper,
conversion,
kangoo,
micro-van,
motorhome,
my,
partner,
red,
self build,
speedway,
van
Monday, 19 January 2015
Multi-Purpose Worktop
I'm going to call this one a success. While the build quality is such that not even a charity shop would try to sell it, the unit I have constructed (and I use that word very loosely indeed) does the job I wanted it to do.
There were one or two minor glitches during the process - one misread measurement, one careless swipe of the hand leading to laminate embedded in a fingertip and a wonderful discovery about using dowels - but in the end, the unit was completed.
Although I was parked right outside work and could easily have made a coffee in the office and brought it out to the van, there's something intensely satisfying about doing it this way.
There were one or two minor glitches during the process - one misread measurement, one careless swipe of the hand leading to laminate embedded in a fingertip and a wonderful discovery about using dowels - but in the end, the unit was completed.
The worktop is just the right size for either the laptop, wash bowl or gas stove and the stove fits perfectly on the shelf when it's not being used (which it should as the unit and the shelf were built specifically around the stove's measurements). It's the right height to use while sitting on the bed and is small enough to slide up against the back of the seats when I need the floor space for shopping or recycling.
I tested the stove today at lunchtime and discovered that I can use it quite safely without melting the picket placards - I mean window blackouts. It warms the van up nicely but of course I remembered to leave the door ajar to avoid a build up of fumes.
Labels:
bed,
camper,
gas stove,
kangoo,
laptop,
micro-van,
motorhome,
partner,
red,
repair,
self build,
strange campers,
weird rvs,
window blinds,
worktop
Wednesday, 14 January 2015
Some Winter Usage
I don't like winter, but now that Christmas and New Year are behind us the days have started getting a little longer and I'm pottering around in the back of the van during the evening again. Yes, it's dark by the time I get home from work, but between the outside light on the drive and the head torch I have just about enough light to work by.
Yesterday I put the bed back in. I know I posted about it being unsafe, but if I put it down the other side I can't have any back seats up at all and I can't see any sensible way to carry it on it's side, so I'll just have to hope that nobody hits me in the rear hard enough to ram the bed forward - for now anyway.
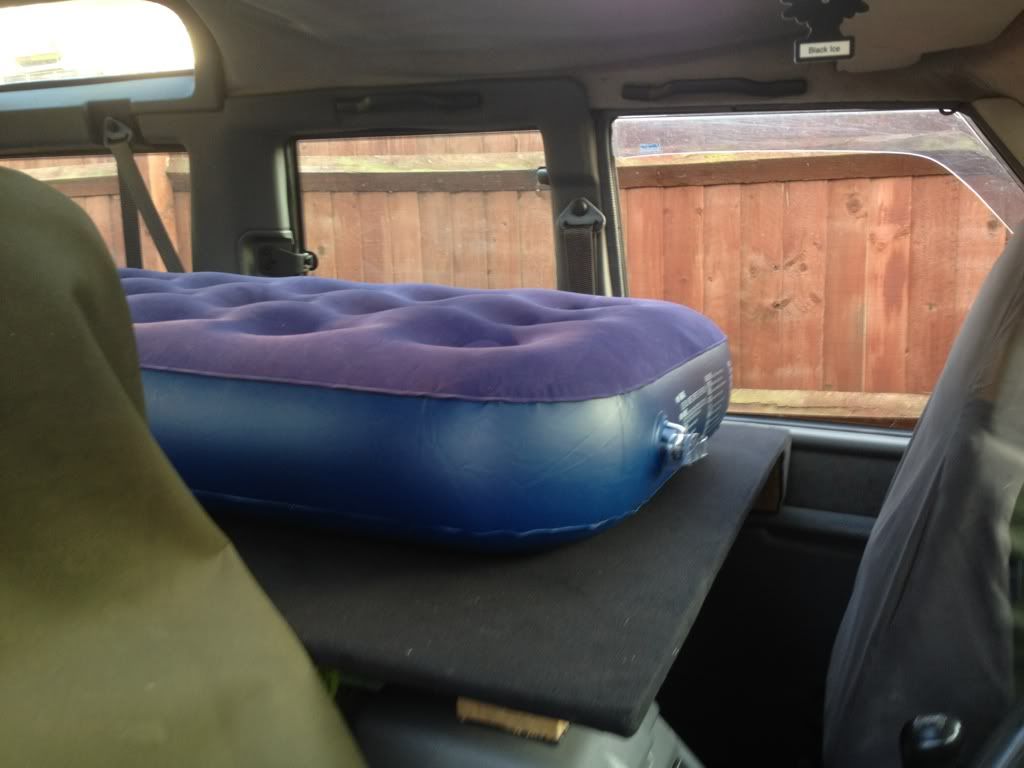
Having taken the mattress and bedding out for the winter it seemed silly to put them back in just on a whim, so I have inflated the airbed and am using that on top of the bed frame. I figure that not much can happen to a plastic airbed in the cold and damp (although if something does I will call it a learning experience and head to Asda for another one).
| An airbed in a van - neither are mine, just a pic from the net to break up the text |
So today's lunch break was spent lounging in the back of the van, propped up on a rucksack full of spare clothes, drinking coffee and watching Netflix on my tablet. It was more comfortable than sitting at my desk (we have no staff room), quieter than Starbucks (or any other coffee shop or restaurant at lunch time in a busy city centre) and afforded me some privacy.
I have experimented with different storage options, starting out with a single plastic tote with a hinged lid. When I started planning the bed I hoped to store the tote underneath it, but this didn't work out so it slid around in the back of the van, sometimes on the top of the bed and sometimes beside it.
I had to add a second tote when I bought more gear and new then that something had to give. Although they stacked beside the bed, there was no room to move around them and they had to come out if I needed to carry anything else.
| I may have too much stuff in the back of my van, but at least I know mine will never be this bad. |
Recently the totes were replaced by a pair of folding crates and these took up less space, but still didn't work around the bed very well. Last week I came across under-bed storage boxes in Asda for three pounds each and bought a couple. Most of my gear is now stashed in these and they both slide under the bed and out of the way. I still have a few things in a folding crate, but have an idea to get rid of this and to gain a worktop which will support either a laptop, wash bowl or gas stove and which will store the cooker and gas underneath when not needed. This will free up a lot of space in one of the under-bed boxes, which means I can get rid of the last folding crate.
Of course, like many of my ideas this may not happen, but I will be popping into B&Q tomorrow for a dig in their offcuts bin.
I've added some random pictures from the web but I wanted to add a couple of my own. I got a Selfie Stick for Christmas, so here are a couple of 'in the van' selfies taken this evening.
Friday, 2 January 2015
Winter Hiatus
Changing the Bed Again!
The bed that I had in there for a while is standing on end in our spare bathroom, but I am wary about putting it back in the van because I suddenly realised how unsafe it is.
Because the bed reaches from the back doors to the back of the driver's seat, if anyone were to drive into the back of Tyrion, the force of the impact would travel through the bed and straight into my back. I could avoid that by putting it on the passenger side, but that would then offer the same risk to anyone travelling in that seat.
So for now the bed will stay in the spare bathroom unless I need it for a solo trip - and then I will have to pay attention to how I travel with it - but for longer term I need to return to the drawing board and come up with something else.
Sunday, 21 September 2014
Lower Bed
I have reduced the height of the bed by 11.5 cm - which is strange, because all the measurements were in inches when I built it. My able assistant today was my son Robert, who has assisted with measuring and cutting, gluing and screwing. He made the first measurement and as he works in centimetres, we stayed with them.
It was a simple case of measuring between the bed and the highest point of the folded back seat to work out how much we could reduce the height by, then removing that amount from each of the six vertical pieces of wood that make up the bed frame and the end support.
The end result is much better. Sitting on it is easier and leaves plenty of headroom. Lying down on it is easier too - I don't feel like I am climbing up onto it any more. There is not enough space under the bed now for the plastic storage box, but for now I can stack two on top of the bed frame. I hope to add sides to the bed frame and hinge the top so I can use the space underneath for storage.
This should now allow me to use the van during the day when I'm at work. Sometimes my back is bad enough that a lie down helps a great deal. At home that's not a problem, but at work it obviously is. With the bed at its previous height, getting on to it was difficult when my back was really bad, but now it should be easier, so hopefully I will be able to spend the occasional lunchtime lying down and easing my back.
I just hope I don't nod off and sleep through the afternoon.
The end result is much better. Sitting on it is easier and leaves plenty of headroom. Lying down on it is easier too - I don't feel like I am climbing up onto it any more. There is not enough space under the bed now for the plastic storage box, but for now I can stack two on top of the bed frame. I hope to add sides to the bed frame and hinge the top so I can use the space underneath for storage.
This should now allow me to use the van during the day when I'm at work. Sometimes my back is bad enough that a lie down helps a great deal. At home that's not a problem, but at work it obviously is. With the bed at its previous height, getting on to it was difficult when my back was really bad, but now it should be easier, so hopefully I will be able to spend the occasional lunchtime lying down and easing my back.
I just hope I don't nod off and sleep through the afternoon.
Labels:
bed,
berlingo,
camper,
conversion,
cover,
electrics,
kangoo,
micro-van,
motorhome,
my,
partner,
red,
repair,
self build,
van
Saturday, 20 September 2014
White Kangoo
This white Kangoo van camper conversion is on eBay at the moment. If you are interested, the link to the auction is here.
I was attracted to this listing because it’s a Kangoo and I wondered if I could get any ideas for mine by looking at this – and the answer is yes.
The first thing that strikes me about this Kangoo is how spacious the back looks when compared with mine. There are two reasons for this. Firstly this van has no back seats (because it knows it’s a van and isn’t confused about whether or not it might be a car, like mine is). Secondly, the bed base is a lot lower and narrower than mine.
From the pictures you can see that the bed is half width when folded. It looks plenty wide enough as a bench seat and there is plenty of room between it and the unit. When unfolded it fills that gap, but the cushions from the bench sit snugly to form a mattress.
The supports for the folding section look like doors on the front of the bed base, but in the view showing the inside of the bed base you can clearly see that there is no access through the front. This is a clever idea because the supports do the job when needed, but look very tidy when not.
The bed base is a storage area, which is a better idea than mine – I have a plastic tote under my bed frame. If I changed my design to a solid box, I could lose the storage box and utilise all of the space in the bed.
I note that the bed is constructed using plastic angle connectors – this means there are no unsightly screw heads on the outside of the bed and no need for battens on the inside – which could look scruffy (definitely would if I built it) and which would inevitably reduce the usable storage space. This angle connector is the same colour as the trims around the doors (and the supports that look like doors) so it all blends in nicely with the wood (or wood-effect MDF) and the grey carpeting on the walls and doors.
The storage nets on the back door and side wall of the van look very useful – I would consider one but I would have to block up a window with ply to have anywhere to fix one.
The table is a common single-leg design and I presume that this is taken to pieces and stored under the bed when necessary. There is even a skylight in the roof, to provide natural light in the absence of windows and ventilation without compromising security.
This van has given me lots to think about.
Labels:
bed,
berlingo,
camper,
conversion,
home made curtains,
kangoo,
micro-van,
motorhome,
my,
partner,
red,
self build,
van
Monday, 15 September 2014
Road Rage
This morning I was driving MyRedVan to work and became the victim(ish) of a road rage(ish) incident.
I let a couple of vehicles out of a junction in stop-go, rush hour traffic, then almost immediately had to stop to let a bus pull away from a bus stop (it's in the Highway Code that if the bus isn't in a lay-by, you are supposed to stop and let it pull out).
The chap in the blue VW behind me clearly decided that in spite of the volume of traffic, I was somehow slowing him down significantly. He flashed his headlights to get my attention, then once I was looking at him in my mirror he made an up-and-down gesture with his hand that every male on the planet would immediately recognised.
Perhaps he had read the 'please leave space for my wheelchair' sticker in the back window and decided that I would be easy to intimidate, or perhaps he thought that a Kangoo could only possibly be driven by an elderly person or a woman. Either way, he seemed surprised and not best pleased with my reaction - which was to grin at him and wave. I may have restricted mobility, but I'm not about to be intimidated by an impatient bully.
Once the traffic started moving again he stayed well back - so far back, in fact, that he was barely visible in my mirror. I'd like to think that my charming smile and wave pacified him, or that he thought I might just be crazy enough to reverse into his pride-and-joy in a fit of anger. However, it was more likely that he just slowed down to use his mobile phone while he was driving to explain to his boss that he was going to be late for work because of the slow-moving little red van in front of him.
I strongly believe that people shouldn't be able to drive how they like, berating others aggressively, and get away with it. It's bullying, plain and simple and bullies on the road are as bad as bullies anywhere else and I believe that they should be treated with utter contempt.
I let a couple of vehicles out of a junction in stop-go, rush hour traffic, then almost immediately had to stop to let a bus pull away from a bus stop (it's in the Highway Code that if the bus isn't in a lay-by, you are supposed to stop and let it pull out).
The chap in the blue VW behind me clearly decided that in spite of the volume of traffic, I was somehow slowing him down significantly. He flashed his headlights to get my attention, then once I was looking at him in my mirror he made an up-and-down gesture with his hand that every male on the planet would immediately recognised.
Perhaps he had read the 'please leave space for my wheelchair' sticker in the back window and decided that I would be easy to intimidate, or perhaps he thought that a Kangoo could only possibly be driven by an elderly person or a woman. Either way, he seemed surprised and not best pleased with my reaction - which was to grin at him and wave. I may have restricted mobility, but I'm not about to be intimidated by an impatient bully.
Once the traffic started moving again he stayed well back - so far back, in fact, that he was barely visible in my mirror. I'd like to think that my charming smile and wave pacified him, or that he thought I might just be crazy enough to reverse into his pride-and-joy in a fit of anger. However, it was more likely that he just slowed down to use his mobile phone while he was driving to explain to his boss that he was going to be late for work because of the slow-moving little red van in front of him.
I strongly believe that people shouldn't be able to drive how they like, berating others aggressively, and get away with it. It's bullying, plain and simple and bullies on the road are as bad as bullies anywhere else and I believe that they should be treated with utter contempt.
Labels:
12v,
berlingo,
camper,
conversion,
electrics,
home made curtains,
kangoo,
micro-van,
mirror,
motorhome,
partner,
red,
road rage,
self build,
van
Monday, 8 September 2014
Next Project - Lighting
The next project I am going to try in the van is a two-switch lighting system, with one switch by the left sliding door and the other where I can reach it from the rear doors and from the bed. Many people are familiar with the two-switch system from hallways in their homes - moving either of the switches will turn the light on or off.
The wiring for such a system is simple, you just have to make sure you used double-throw switches. These are switches that have three connections which 'make' according to the position of the toggle. This excellent image from a guitar pedal website, http://www.cubisteffects.com/ makes that clearer:
| Add caption |
Put simply, the live feed from the battery is connected to the centre contact of one switch. A twin wire is run between the two switches and connects the outer contacts to each other. The centre contact from the centre switch is connected to the +ve side of the light (or lights) and the -ve side of the light is connected to the vehicle chassis. This will make the two switches control the light in exactly the same way as a domestic hallway two-switch system.
The difficult part for me is going to be working out how to mount the switches so they are where I need them to be. Again, any advice or suggestions are welcomed by comment or by email to myredvan@outlook.com.
Labels:
12v,
bed,
berlingo,
camper,
conversion,
cover,
electrics,
kangoo,
micro-van,
motorhome,
my,
partner,
red,
self build,
switches,
van,
van lighting
Friday, 5 September 2014
Ready to Roll
Tyrion is ready. Since installing the curtains I have addressed the mattress - again using a low-budget approach.
Foam would have been ideal, but foam would have cost around £30.00 and covers (assuming I didn't make them myself) would have cost more than twice that. However, after browsing the internet looking at other micro-van camper conversions I came across a chap who has simply inflated an airbed and thrown that in the back.
£7.99 bought a single airbed (from Asda I think, although Tesco and Halfords all had them in at a similar price) and as I already had a compressor that plugs into the 12V socket, I just set that running and waited. It took fifteen minutes to fully inflate, by which time the compressor was running hot and about ready to pack in, so I might invest in one that is designed for this job and not for pumping up tyres. However, the fully inflated airbed sits very nicely on top of the bed and the quilt and pillow create a cosy, snug environment to sleep in.
I have laid on this bed several times and on each occasion I have nearly nodded off. It is definitely comfortable enough (and big enough) for me to sleep on and I have no doubt that I will be warm enough through the night.
Here is a picture of Tyrion, with the bed set up and the cooker ready to use.
Hopefully the next post will be about Tyrion's first night out.
Labels:
bed,
berlingo,
camper,
conversion,
home made curtains,
kangoo,
micro-van,
motorhome,
my,
partner,
red,
self build,
van
Saturday, 2 August 2014
Making The Curtains
Keeping to the low budget aim, I went shopping for material for curtains. I needed one for each sliding door and one to run across the van at the level of the front seats (the end of the bed).
First I looked at ready-made curtains, but several things stopped me from buying. First the sizes were all wrong, second the patterns, while very pretty, were completely inappropriate and third, the prices were majestic and majestic is not a budgetary level I would consider.
I looked at material by the metre next and found that to be a much more sensible option. Black material was available that would have cost about £15.00 in total, but something nagged me about that. Then I remembered seeing sheets on sale in Tescos for about six pounds each. I realised that two single sheets would be enough to do the whole job, so I could save myself three pounds!
Then I went into Poundstretcher and found a pair of black sheets for £8.00, which was even better.
I have trimmed and sewn the three sheets using the sewing machine I inherited from my grandma, I then threaded them onto net curtain rods and hung them in the van. The curtain across the van is hung on hooks that attach to the van with magnets - this means that I can move that curtain behind the back seats when they are folded up, maintaining security of the rear load space. The other two curtains are hung on self-adhesive hooks.
I may need to make some adjustments as they are a little gappy where they meet, but I should be able to sort this out with some clips - or perhaps velcro.
As with the rest of the 'build', the curtains could most definitely be better, but they are the best I could do and they most definitely do the job I need them to do, so I am, for now, happy with them. Having said that, now I have them up I would like to add some velcro or magnets to them to keep them together and to hold them to the sides of the van. I would also like to take the left curtain off the inside of the van and attach it to the metal of the sliding door itself - again with magnets or velcro - so the curtain is out of the way when that door is opened.
I am learning as I am going along, which is great fun, and again invite suggestions and advice, either as a comment or by email to myredvan@outlook.com.
Labels:
bed,
berlingo,
camper,
conversion,
home made curtains,
kangoo,
micro-van,
motorhome,
my,
partner,
red,
self build,
van,
window blinds
Sunday, 27 July 2014
Building The Bed
As I may have already mentioned (half a dozen times) my budget for this is as low as I can possibly keep it, so I have shopped around and considered a number of different options for the actual build itself. I was initially considering MDF, but having not worked with this before, I'm not awfully confident about screwing hinges in and expecting them to bear weight. I looked at ply, which I figured would be stronger, but even so, was not confident that the build would be strong enough. I eventually settled on making a batten frame and used two sheets of laminate for the bed support.
I found the laminate in the offcut bin at B and Q and was expecting to pay a few pounds for them, but by the time a staff member came over to price them up, he was so fed up with constantly being dragged away from what he was doing, he just wrote 50p on each. I bought three sheets of wood for £1.50.
The battens were around £8.50 for eight lengths and I opted for what the shop called construction quality which apparently means that you aren't too bothered about appearance, as long as it does the job. As far as I can tell this wood looks just as good as the other wood they were selling, but was about a third of the price.
Wood, screws and hinges bought, it was time to get the tools out and have a go at putting something together. I wasn't expecting miracles, because my skills are just not that great, but I was hoping to get something at the end of it that did what I needed it to do.
It was a hot and sunny day, so the parasol was absolutely essential. The wheelchair in the image is mine and I had to stop and sit every few minutes just to avoid being crippled for days. You can just see in the back of the van the two sides for the rear box. I made these first as I knew the red plastic tote had to fit through them.
Once I had joined these two frames with lengths of batten, I cut a piece of laminate to size and screwed it to the top of the box frame. Then I had to mark and cut the back edge to fit around the door.
You can see in this image that I used an offcut of wood, drilled a hole for a pencil in the right place to rest on the edge of the laminate, then simply ran along the edge of the back door to create the right cutting line. A couple of minutes with a jigsaw and it was done. This little piece of wood saved me a lot of time and is an idea I will definitely be using in the future.
Here is the finished bed, opened out and butting up against the back of the front seat. The plastic totes slide out from underneath and when the front seat is tipped forward, the front support moves forward to create a longer bed. This leaves a small gap between the two laminates, but this is not big enough to cause any problems.
Any craftsmen looking at this construction will probably have their heads in their hands at the dreadful job I have done. I look at it myself and know that sooner or later I am going to have to address this - and probably rebuild it completely - but for now, it does what I need it to do so I am pushing on with the rest.
By the way, this is a good picture to see the different materials I have used for the rear windows - the cardboard on the rear doors and the picket-line signs for the side windows. I would like to take this opportunity to thank the members of the GMB who chose to just drop these signs on the pavement and walk away rather than taking their rubbish home with them.
Once again I invite advice and suggestions, either by comment or by email to myredvan@outlook.com.
Labels:
bed,
berlingo,
camper,
conversion,
kangoo,
micro-van,
motorhome,
my,
partner,
red,
self build,
van,
window blinds
Sunday, 20 July 2014
Designing The Bed
I have looked at several Kangoo conversions on the internet (the best place to find them is YouTube), including some which create a bed space large enough for two. In fact, I have seen some that are large enough to accommodate a double air mattress, fully inflated.
The trouble with this is that the bed then inevitably has to be put away if you want to do anything else at all in the back. A double bed is fine if you are a couple - perhaps even with an awning to cook and sit in - but for a single chap like me, a single bed is more appropriate.
The design of the bed had to accommodate some very specific factors, including the ability to quickly return the van to a five-seater in case someone needed to sit in the back. This meant that the design has to work around the back seats staying in (it would have been much easier to build if the back seats were taken out and stored somewhere until needed).
So the bed has to work around the seats when they are folded down and it has to fit in the space behind the back seats when they are folded up again.
I measured and measured and drew a variety of different designs before finally deciding on the final design - I even used a 3D modelling program to make sure everything fit where it was supposed to.
The box at the back of the van needs to be large enough so I can access the plastic tote stored underneath without having to get out of the van. The section that folds out over the folded back seat needs to be the right shape and size to sit neatly on top of the rear section when the bed is put away. The support leg is longer than the height of the back box because of the drop in the floor where the back seat passengers feet go.
Of course, with my limited woodworking skills and budget, there is no way the finished product is going to look as neat and well-built as these images, but this gives me something to aim for.
Labels:
bed,
berlingo,
camper,
conversion,
kangoo,
micro-van,
motorhome,
my,
partner,
red,
self build,
van
Tuesday, 8 July 2014
Rattling Mirror.
The van rattled incredibly when I first bought it. The back end was quickly fixed with liberal applications of WD40, but that left the driver's mirror. At speed or when idling in traffic, the mirror cover resonated and vibrated so loudly, I often resorted to grabbing it with my hand just to stop the noise.
When I popped the cover off I noticed that a plastic retaining tab had snapped off and there was a small crack in the cover. I briefly (five seconds) considered buying a new mirror cover, then decided that there was probably a quicker and much cheaper option.
In the image below you can see the careful application of material specially chosen for its sound deadening and vibration absorbing properties. Carefully removed from the end of a car wash sponge with a pair of scissors, trimmed to exacting specifications and held in place with cyanoacrylate (super glue), this material proved the perfect substance for the job. The effect was instant and complete.
Now that the mirror cover is snapped back into place, it is almost impossible to see the crack and completely impossible to see the sponge - and no more rattle!
Labels:
berlingo,
camper,
conversion,
cover,
kangoo,
micro-van,
mirror,
motorhome,
my,
partner,
red,
repair,
sponge,
super glue,
van
Sunday, 6 July 2014
Cleaning Out
Until today I have had a problem with the back seat. Although it would fold forward, one of the catches was stuck so it would not flip up and sit at the back of the front seats as it is supposed to do. However, with a bit of WD40 and, after Googling, some carefully-applied brute force, the seat now flips up.
Once I had released the seat I was disgusted at the mess I found beneath. I can only assume that the previous owner used it to carry building supplies because there was sand, gravel and dust all over. When I started to sweep it up I could see that it was jammed underneath the plastic trim in the back so there was only one way to get it clean, I had to take the plastic out.
In the picture below you can see the sort of muck I had to deal with. It was like this through the whole back of the van. Once I had finished, though, it was nice and clean (next picture).
| Dirty :-( |
| Clean :-) |
As I had the plastic trim out, it made sense to give it a clean before putting it back. The side trims are held in with three clips each and the back edge trim is held down by torx screws. With these removed, the liner just lifts out. Putting it all back together was just as simple.
I forgot to take a picture of the empty van with the plastic refitted because I was so excited by the extra space in the back. The before and after pictures below clearly show the difference flipping up the seat has made to the space in the back.
| Before - No Space :-( |
| After - Lots of Space :-) |
Bike Carrier
My mother has a new electric bike but because we live on a hill she has not had much practice with. I decided it would be a great idea to pop it in the back of the van and take her to the park, where she could ride around on the flat.
I had to flip up the small back seat but the larger seat won't flip up because one of the catches is jammed. However, there was just enough room for the bike with the front wheel turned sideways and pushed up against the inside of the sliding door.
There are plenty of tie-down points in the back so it was a simple job to secure the bike and stop it moving. The route we took to the park is up and down some very steep hills and along some very windy roads, but the bike didn't move an inch.
One minor hiccup was that once we had unloaded the bike at the other end we realised that neither of us had picked up the keys, so we had to put it back in the van and come home again. By that time mother had had enough, so in the end she didn't even get to ride it.
Still, it was fun for me.
First Cup of Coffee
I have been collecting gear in my little red box ready for when Tyrion is ready for his first night out. Recently I was looking at kettles and almost bought a 12v kettle from Halfords. I'm glad I read the small print because the time to boil on a 12v system was given as 18 minutes.
I settled on a single-burner stove and a whistling kettle. The two of them and a gas cannister for the stove cost less than the 12v kettle and when I tested them the kettle boiled in just 3 minutes. I'm happy with that.
Subscribe to:
Posts (Atom)