Showing posts with label strange campers. Show all posts

Saturday, 23 May 2015

Camper Limo

I came across this picture on Facebook and shared it immediately, with the comment Oh My God!


I can't believe someone would chop up several VW campers and weld them together to create this absolute monstrosity - with half a VW Beetle welded backwards on the roof, complete with door handle.

The inside isn't much better - there are curtains on some windows, but not on others, which strikes me as plain weird, and the inside of the Beetle just looks ridiculous perched up above. There is wood-effect flooring and ceiling, but these do nothing to detract from the awful green colour used both inside and out.


All in all this is an appalling vehicle. Whoever has made this has taken four or five classic vehicles and created an absolute monstrosity. I feel sorry for anyone who orders a limo and has this turn up to collect them.

Saturday, 2 May 2015

The Consumer Unit

Once I completed the basic electrical installation detailed in my previous post I began to look into the other elements of installing mains electricity in a vehicle. I figured there had to be a reason for consumer units, RCDs and all the other stuff - otherwise everyone would just wire a socket to a cable and call it an installation.So I have spent the remainder of today researching consumer units and associated technology and I learned a lot.

Doesn't look complicated at all!
I had been working on the basis that any electrical outlet, including the one in my garage and those on campsites, would be fused and protected and that this protection would be sufficient. However, unless I inspect the electrical installation of every location I connect to I have no way of knowing how 'protected' they are. Also the protection needs to be appropriate to the device connected. This is why circuit breakers in consumer units have different ratings.

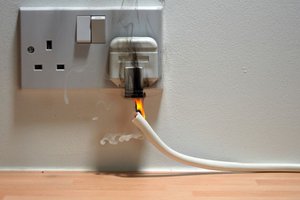
What I don't want to happen.
Having worked out that I absolutely have to have some additional protection, I had to work out what I need. So the first place I looked was on camping supply websites. The most popular unit being sold was a unit containing an RCD, a 16Amp MCB and a 6Amp MCB. A little research on various other sites taught me that the RCD detects differences in the current passing through the device in each direction and breaks the circuit if the difference is over a specified amount (30mA seemed a popular amount).
MCBs are miniature circuit breakers which break the circuit either if too much current is being drawn or the switch is thrown manually. The 16A MCB is designed to protect the mains sockets, the 6Amp protects the lighting circuit. This very informative video explains how an MCB works.


So there is little point me relying on a 16A MCB to protect a 6A lighting circuit which would clearly fry before the current reached anywhere near blowing the MCB.

It took me a while to find an accurate wiring diagram - it seems that the experts are  hesitant to provide this kind of information, perhaps understandably - but after looking at a few images and watching a few videos, I am now completely confident that I can safely and accurately wire up a consumer unit.

The prices I have seen range from £5.00 for a used one (that looks like it might have been on fire at some point) up to £47.00. These have all been the same type, with an RCD and two MCBs. I have settled on £16.00 which gets me a new unit with the right MCBs.

This is what I have ordered, £16.28 including two MCBs of my choosing.
This means that I should have a fully operational and safely protected electrical installation in time for my camping trip in June - only 5 weeks until the Speedway World Cup in Kings Lynn.

Note: Again this isn't a 'how-to', it's a 'how-I'm-going-to'. If I get it wrong, it's my fault. If you copy anything here and get it wrong then it's yours. #justsaying

Friday, 1 May 2015

Finally! A Camper!

Today I sewed the bottom of the back window curtains so they slip over the wire rather than tucking under it. Once I had done this I realised that a couple of wraparounds ought to tidy them up nicely and I was right.


This made me think that the black curtain along the side of the bed might look better with a wraparound to bundle it up but I was wrong. It looked awful. I tried a couple of different things with it and in the end threw it away and replaced it with a terracotta one. The curtain I had cut up to make the two back curtains had plenty of material left on it so I simply tidied up the bottom, hemmed it on my sewing machine and threaded it onto the wire.


That made me realise that the left hand side of the van was the only side with black windows. I covered the back window infill with terracotta material and started planning a magnetic infill for the sliding door when I realised that perhaps I didn't need to.

I had attached the black curtain to the sliding door on that side when I was using curtains on a stiff pole mounted with magnets. This was because that when I opened this door I didn't want to have to fight through a curtain which didn't slide out of the way.

Using the wire means the curtains do slide out of the way. Because of this I saw that I could put a normal hanging curtain across that sliding door. I also realised that as the curtains move easily, I could put a curtain over the rear window on that side too - the one behind the worktop where the stove will sit. If I am using the stove I can simply slide the curtain out of the way.

So I drilled and screwed and cut up another curtain. This one was a little trickier because I wanted a single curtain all the way across, but it needed to be longer by the sliding door and shorter by the worktop. A minute or two of measuring soon sorted this and the day's practice at the sewing machine meant I was getting quite proficient at hemming by this time.


All of the curtains are now terracotta and all but one have velcro wraparounds fitted - I simply ran out of steam toward the evening and had to call it a day. I have the last wraparound half-completed and will finish it off another day.

Looking at the van with these curtains, nicely bunched up with their colour-coordinated wraparounds, it actually looks like a camper to me now. 


With only a few weeks to go before I head off to Norfolk, I am very happy with the changes I have made to the curtains. Instead of a car with blacked out windows, Tyrion now actually looks like a micro-camper. 


The trouble with this, of course, is that I now have to look at adding an electric hook-up and after looking online briefly, I am pretty confident that this is within both my budget and my physical capability.

Wednesday, 29 April 2015

Bed Test

I put the bed back in this afternoon.

Now the weather is turning and now we have finished moving house, it felt like a good time to get Tyrion back into micro-camper mode. I have put the bed back in and am using both the mattress (for short stops) and the airbed. I fitted the worktop, added a doormat, found a quilt and some pillows, then decided to test the bed.

I found it very comfortable initially but wondered if it was the sort of bed that would get uncomfortable after a few minutes.

Mrs woke me up two hours later. The bed definitely passed the test.


I have added an electric coolbox which will be perfect for a couple of cans, a bottle of milk and some snacks. Apart from some additional lighting I can't see anything else that is needed.


It might be time to stop playing and actually get out in it for the night.

More Curtains

The 'found' curtains I used for the front of the van have been changed. I had four large terracotta-coloured curtains and realised that if I used two of those for the front, I could cut the other two into smaller sections for other windows.

The cardboard panels in the back windows have been falling out recently - the cardboard has soaked up some moisture from somewhere and lost some of it's rigidity, so I decided that it was time for a change.

I now have hand-sewn curtains at the back windows. To attach them I used net curtain wire which I have screwed to the inside of the doors - this meant actually drilling into my van, which was something I wasn't keen on initially, but after the first couple of holes I didn't think much about it.


Mrs suggested using another wire at the bottom of each window to stop the curtain flapping and this works perfectly (please excuse the dirty back windows, Tyrion is overdue a wash).

The success of these curtains made me want to try more, so I replaced the black curtain along the offside of the van. I used another net curtain wire, again screwed to the metal of the van, and ran it above both the windows on that side. As the bed presses up to this side of the van there is no need for a lower wire, which is good because it would block access through the sliding door on that side when in 'car mode'.

This left one single red shiny window infill. I thought about replacing this with a curtain but quickly realised that this was right over the worktop where the gas cooker would sit. I don't think having a fabric curtain that close to a gas burner would be a good idea, so I removed the infill, placed the fabric between it and the window then pushed the infill back in place. A quick trim with scissors left my GMB logo still visible on the inside, but the outside now showing black fabric.

So I have terracotta fabric front and back and black fabric down both sides. A very productive day's work.

Monday, 27 April 2015

Table Still Stable

It's been a hectic time recently but I still found time to clip my worktop in place and drive around for a while to see if it stayed where it should.

I am happy to report that it did.


Feel free to ignore the cardboard boxes ready for a run to the recycling centre.

Thursday, 23 April 2015

Stable Table

My multi-purpose worktop has been very successful so far, but the issue I had with it was movement while driving. It was held in by a bungie cord which stopped the top part from moving but the bottom kept sliding out.

The easy answer would have been to attach it to the inside of the van with brackets, but it has to be removable so this wouldn't work for me. Instead I have used toggle clips (I didn't know they were called that until I found them in B and Q and read the name on the packaging). I have riveted an angled piece of tin to the interior trim in the back and riveted the hook to this tin. The toggle clip itself is simply screwed to the bottom of the unit. To prevent the toggle clip popping open while driving I have popped a split pin in the holes.

This sounds fairly simple but I had to cut holes in the trim using my dremel then cut and shape the tin, drill and rivet the hook and then put it all in the van so I could accurately mark the holes for the toggle clip screws. It was time consuming and for someone as inexperienced with tool work as I am, a bit of a challenge, but I finished it and it works.


Once again the craftsmanship is well below the standard anyone would expect from a tradesman, but as DIY done just for me, it's a pleasing thing to look at and it does what I need it to do.

New Curtains

On moving into the new place I investigated the loft and found that it is going to be perfect to set up my keyboard and guitars and maybe even do some more recording. None of that is relevant to this blog, but the curtains that were left behind by the previous occupants certainly are.

I found several pairs of very large curtains - more than six foot square. Two pairs are a terracotta colour with some sort of arty writing on them. The other pair (perhaps two pairs, I can't remember without climbing back up the loft ladder) are dark brown, almost black.

I had a few metres of shock cord in the van (the stretchy stuff bungies are made from) which I had bought with something else in mind, but I found that this was the perfect solution to 'hang' these curtains. The cord runs from the hooks in the roof each side, just above the sliding doors, around the front of the cabin and hooks onto the sun visors. Once the idea had occurred to me it was a simple case of knotting a loop in each end and hooking it on. There was some playing to get the length and tension right, but that was the hardest part.

The pictures below show the original black curtain solution compared with the new brown curtains.


The black curtain ran across the van behind the front seats. This meant that when lying in the bed my feet pushed against the curtains. The new curtains run around the front of the cabin, meaning there is a lot more space in the curtained-off area. Their size means there is no issue with gaps and they are thick enough to block out a lot of light.

I am very happy with this new curtain solution and hope to make something similar happen in the back of the van, which is currently blacked out with window-shaped infills, one of which keeps falling off and is currently held on with sellotape.


Monday, 19 January 2015

Multi-Purpose Worktop

I'm going to call this one a success. While the build quality is such that not even a charity shop would try to sell it, the unit I have constructed (and I use that word very loosely indeed) does the job I wanted it to do.

There were one or two minor glitches during the process - one misread measurement, one careless swipe of the hand leading to laminate embedded in a fingertip and a wonderful discovery about using dowels - but in the end, the unit was completed.


The worktop is just the right size for either the laptop, wash bowl or gas stove and the stove fits perfectly on the shelf when it's not being used (which it should as the unit and the shelf were built specifically around the stove's measurements). It's the right height to use while sitting on the bed and is small enough to slide up against the back of the seats when I need the floor space for shopping or recycling.


I tested the stove today at lunchtime and discovered that I can use it quite safely without melting the picket placards - I mean window blackouts. It warms the van up nicely but of course I remembered to leave the door ajar to avoid a build up of fumes. 


Although I was parked right outside work and could easily have made a coffee in the office and brought it out to the van, there's something intensely satisfying about doing it this way.

Thursday, 15 January 2015

My Next Project

Since the day I brought Tyrion home - actually since the day I saw him on the trader's website - I have been going through designs in my head for a storage unit with a worktop. There are lots of different ideas out there on the internet but none that meet my needs. Tyrion has to be ready to become a car again at a moment's notice and even when the bed is in the back, I still need to make sure there is enough room for a week's shopping.


I have come up with an idea for a unit that provides a worktop and which has a shelf for my stove (which will free up valuable space in my under-bed boxes). If my plan comes to fruition, this unit will be able to move from one place to another according to needs.

When in full bed mode (i.e. whenever I am not taking mother shopping, the glass for recycling or some rubbish to the tip) the unit will sit over the nearside wheel arch, up against the back door. The nearside sliding door will then be my entrance and exit. Positioned here I will be able to use the bed as a seat while I am cooking, washing or using my laptop. It will also make a useful surface to dump my pockets out on when going to bed.

However, this will be no good when I go shopping, so my plan is to make the unit the right size so it will also fit in the space left by the single rear seat when it is folded up. This way the storage will still be there, the unit won't have to come into the house when I need to use the van for other things and I will be able to get the shopping in through the back door.


I measured yesterday evening and started drawing up ideas. This afternoon I drew up a final plan then I hit B&Q's offcuts bin this evening and bought a couple of likely-looking chunks of wood. I picked up some brackets and screws while I was there, so I now should have everything I need to make the unit (apart from the knowledge and any real skill with woodwork or tools, but I'm planning to worry about that later).

Here's an image of what the final unit should look like - although I am much better with Google Sketchup than with a saw and a screwdriver (as my bed base efforts have already shown).


So if you have a free hand this weekend, please cross your fingers and perhaps say a little prayer as I start hacking up cardboard templates, sawing into chunks of wood, cursing wrong screws and bad weather and arguing with my missus about sawdust all over the conservatory carpet.

Wish me luck.

Wednesday, 14 January 2015

Some Winter Usage

I don't like winter, but now that Christmas and New Year are behind us the days have started getting a little longer and I'm pottering around in the back of the van during the evening again. Yes, it's dark by the time I get home from work, but between the outside light on the drive and the head torch I have just about enough light to work by.


Yesterday I put the bed back in. I know I posted about it being unsafe, but if I put it down the other side I can't have any back seats up at all and I can't see any sensible way to carry it on it's side, so I'll just have to hope that nobody hits me in the rear hard enough to ram the bed forward - for now anyway.

Having taken the mattress and bedding out for the winter it seemed silly to put them back in just on a whim, so I have inflated the airbed and am using that on top of the bed frame. I figure that not much can happen to a plastic airbed in the cold and damp (although if something does I will call it a learning experience and head to Asda for another one).

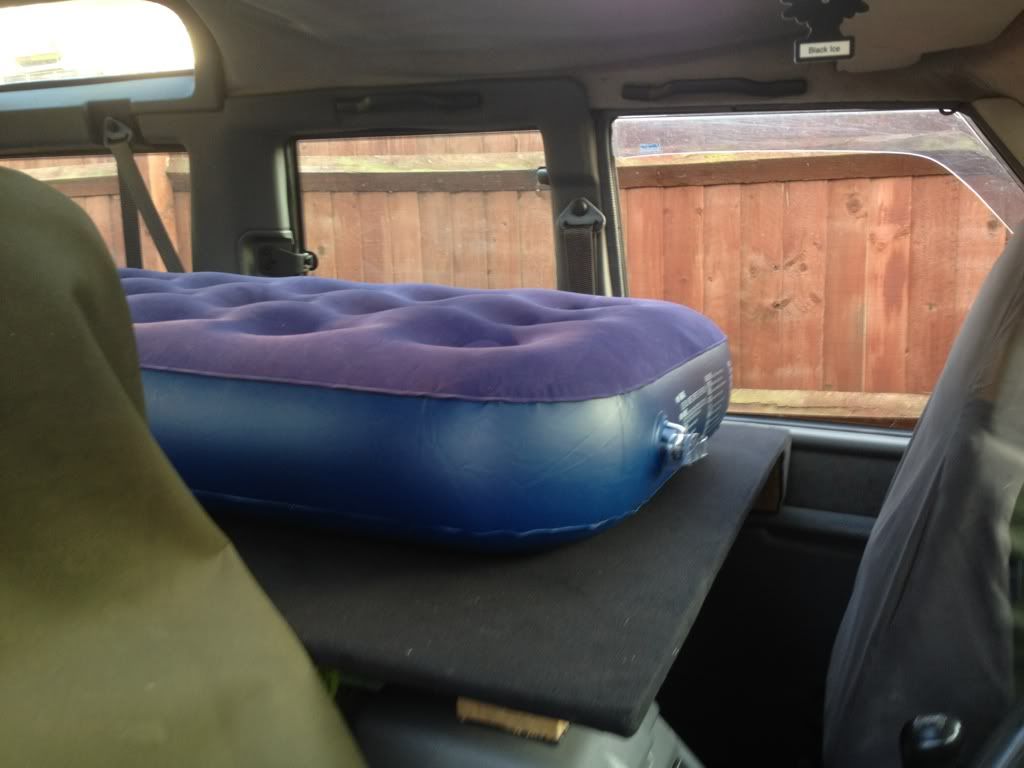
An airbed in a van - neither are mine,
just a pic from the net to break up the text
So today's lunch break was spent lounging in the back of the van, propped up on a rucksack full of spare clothes, drinking coffee and watching Netflix on my tablet. It was more comfortable than sitting at my desk (we have no staff room), quieter than Starbucks (or any other coffee shop or restaurant at lunch time in a busy city centre) and afforded me some privacy.

I have experimented with different storage options, starting out with a single plastic tote with a hinged lid. When I started planning the bed I hoped to store the tote underneath it, but this didn't work out so it slid around in the back of the van, sometimes on the top of the bed and sometimes beside it. 

I had to add a second tote when I bought more gear and new then that something had to give. Although they stacked beside the bed, there was no room to move around them and they had to come out if I needed to carry anything else.

I may have too much stuff in the back of my van,
but at least I know mine will never be this bad.
Recently the totes were replaced by a pair of folding crates and these took up less space, but still didn't work around the bed very well. Last week I came across under-bed storage boxes in Asda for three pounds each and bought a couple. Most of my gear is now stashed in these and they both slide under the bed and out of the way. I still have a few things in a folding crate, but have an idea to get rid of this and to gain a worktop which will support either a laptop, wash bowl or gas stove and which will store the cooker and gas underneath when not needed. This will free up a lot of space in one of the under-bed boxes, which means I can get rid of the last folding crate.

Of course, like many of my ideas this may not happen, but I will be popping into B&Q tomorrow for a dig in their offcuts bin.

I've added some random pictures from the web but I wanted to add a couple of my own. I got a Selfie Stick for Christmas, so here are a couple of 'in the van' selfies taken this evening.


Friday, 2 January 2015

Winter Hiatus

Changing the Bed Again!

Tyrion has been in car mode for the winter. All the soft furnishings (bedding, mattress, etc.) have been taken indoors for the duration and the hardier gear has been boxed up in the boot. This has given me some time to think about how to move it forward when the weather improves.

The bed that I had in there for a while is standing on end in our spare bathroom, but I am wary about putting it back in the van because I suddenly realised how unsafe it is. 


Because the bed reaches from the back doors to the back of the driver's seat, if anyone were to drive into the back of Tyrion, the force of the impact would travel through the bed and straight into my back. I could avoid that by putting it on the passenger side, but that would then offer the same risk to anyone travelling in that seat. 

So for now the bed will stay in the spare bathroom unless I need it for a solo trip - and then I will have to pay attention to how I travel with it - but for longer term I need to return to the drawing board and come up with something else.


Wednesday, 17 September 2014

Excellent VW Caddy

Also on eBay recently was this excellent VW Caddy conversion. On the outside it looks to be in great condition, with nice paintwork, alloy wheels and a bonnet protector. To me it definitely doesn't look its age.


Ignoring the cab (which I generally do), the back of the van is a fairly standard layout, with the bed down one side, storage down the other side and a small space between. The bed is a sofa during the day, with a cushion attached high on the side of the van - presumably to avoid banging your head. The laminate flooring is nicely edged with angled tread-plate aluminium, while the sides and roof are nicely covered in carpeting material. 


The rear doors both sport hinged tables, which are secured by hook-and-eye when not in use. This is a great way to create a safe surface for a stove when using a small van. It solves the twin problems of ventilation and headroom, without resorting to expensive and heavy slide-out units. Also visible in this picture are the mains sockets, which are presumably attached to an inverter.


The LED lighting in the roof and the worktop look to be sufficient to light the back of the van while being small and unobtrusive - and, of course, being LEDs, they will be less of a drain on the battery.


The TV and DVD player sits nicely between two small storage units and the worktop gives plenty of room for a laptop or a wash-bowl - or somewhere to rest a plate at mealtimes.

I like this van very much. The build quality is good, showing a lot of thought and attention to detail. The van looks cosy but not cramped and the tables on the rear doors save valuable inside space. I have a single criticism, which is that there don't appear to be any curtains. The windows in the back doors are tinted, but not blacked out. Privacy would have to be addressed to use this as an overnight van. However, that could be sorted fairly simply and once done, this van would be pretty much the perfect micro-camper.


Tuesday, 16 September 2014

Mercedes Box Van 'Camper'

I saw this curious Mercedes box van 'conversion' for sale on eBay and just had to share it. I wonder who, if anyone, would bid for this. 


There is no entry from the cab to the living space and looking at the images, a four-step staircase is necessary to get into the back. This clearly won't fit in the cab with the driver, so I guess you have to try and open the back door (somehow) and drag the steps out before climbing up in.


The bed looks about the right size for a ten year old, unless the scale of the image is wrong. The furniture seems to be a mixture of home-made out of timber and reused domestic cabinets - and some things that are a combination of both.


The back door wouldn't look out of place on a terraced house, but looks incredibly out of place on the back of a box van. However, it fits very well with the wood framed windows, which look like they might have been pulled out of a skip.

The full-size sink and drainer could come in handy, as does the four-ring gas hob, but both look rather out of place in the back of a wagon.


Overall this 'camper' looks very spacious and comfortable, but the back door and windows look ridiculously out of place. While these could potentially be replaced with something more in keeping, the height of the rear door is not something that could easily be changed, so for me this would be unusable.

Sunday, 14 September 2014

Strange Campers

I love having a dig around the internet looking for interesting and novel approaches to campers. Some of the things I come across are inspiring, some are great at showing what not to do, and some are just plain crazy, like this modified caravan found on YouTube...


As a self-build fan, I take an interest in self-builds of all kinds as you never know where you might find an idea you can modify and apply to your own van. However, this self-build pick-up truck is, for me, a great example of what not to do...

http://www.pinterest.com/pin/293648838176299846/

If you're a fan of motorhomes and a fan of boats, what do you do if you have trouble choosing between one and the other? You could try this...

http://www.pinterest.com/pin/465700417690509548/

Another unusual motorhome, but this one actually looks like it would work very well - although I would guess it would take some time to set up and would probably have no space inside when collapsed. It wouldn't suit me, but for some it might be idea...

http://www.rvtravel.com/blog/weirdrvs/2009/06/new-twist-on-arizona-room.html